What equipment do you need to start making music? Truthfully, not very much.
In this post, I’m going to give you a breakdown of all the physical and digital gear I use to make music. Some of these things are essential, others are simply “nice-to-haves.”
Finally, I’ll give you my recommended beginner gear list (this is what I’d buy if I had to start over), and how you can build a home studio for less than $350 (seriously).
Feel free to use the table of contents to jump from section to section, and let’s get started!
This post contains affiliate links. If you purchase using these links, I receive a small commission at no extra cost to you. Thank you!
Table of Contents
Physical Gear
This list comprises all of my physical music-making gear.
PC
The most important thing you’ll want when building your home studio is a reliable computer. It’s very possible to make music on iPads and tablets, but you’ll be giving up a lot of speed, functionality, and control.
I’ve gone back and forth between Mac to PC throughout my life but ultimately settled on building my own PC tower. I did this both for the sake of getting optimal power and storage for the much lower price tag.
Plus, since I’m pretty sold out on Reaper, I knew I wouldn’t be switching to Mac for Logic Pro (although that DAW holds a very special place in my heart).
I did a lot of research and planned my build on PCPartPicker. Here are my PC specs:
- Operating System: Windows 10 Pro
- Motherboard: ASUS Prime X570-P
- Processor: AMD Ryzen 7 3700X 8-Core Processor
- RAM: 32 GB
- HD: 1 TB SSD, 250 GB SSD (plus many other external drives for storing plugins and files)
- Video card: NVIDIA GeForce GTX 1660 Super
I built this machine in 2020 and it hasn’t shown a single sign of slowing down. Another benefit of PC building is that your system is entirely modular. Upgrading is as easy as popping open the case and putting in more RAM, another processor, or a bigger SSD.
A downside to using a PC is navigating some of the tricky driver issues you’ll run into with certain hardware products. That said, I haven’t had any problems with my particular machine, although I do miss the “plug and play” element of Mac OS.
MIDI controller
A MIDI controller (specifically, a MIDI keyboard) is a device that can trigger sounds or musical notes. MIDI controllers come in all shapes and sizes, from simple keyboards to all-in-one units with pads, faders, and knobs.
These controllers don’t actually make sound but send information to your computer (or another MIDI device) that tells it which notes to play or sounds to affect.
MIDI controllers are optional but very useful if you want to record or compose music using a computer. Many DAWs (including Reaper) allows you to record and play MIDI notes without a MIDI controller, but having one can make the process much easier.
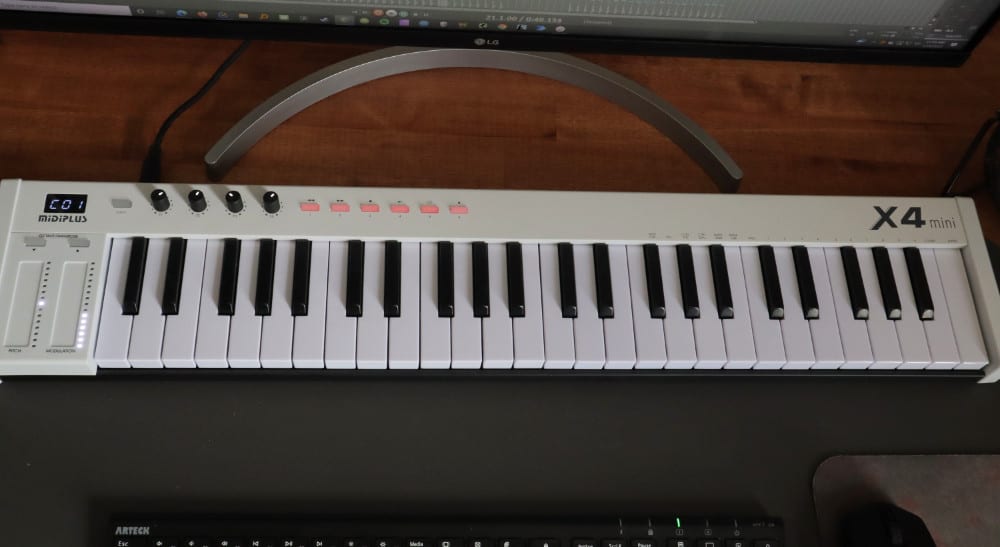
I’ve used many different MIDI controllers, but I’m really loving the MIDIPlus X4 Mini. It fits perfectly on my desk, it’s got some basic knobs and DAW controls, and the keys feel great.
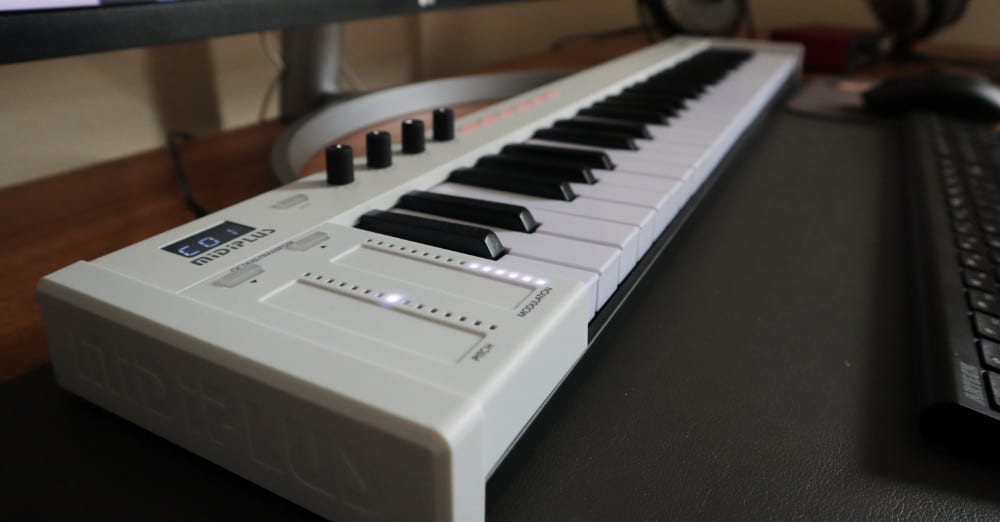
I’ve found that 49-key keyboards are the perfect size for my style of composition. I play piano, so I like to have those (almost) four octaves as I’m sketching out tracks.
Plus, the $90 price tag is insane for a controller of this quality and capabilities.
I don’t really use drum pads in my composition process, but if that’s important to you, you may want to invest in a MIDI controller with pads, such as the Akai Professional MPK Mini. I personally used this one for years and absolutely loved it.
You can see it in action in my cover of Spring Yard Zone here:
Audio interfaces
An audio interface is essential if you want to record sound or monitor your music with high-quality headphones or studio monitors.
Audio interfaces convert analog audio signals into digital signals that can be processed by a computer. They also facilitate a wide array of inputs and outputs that let you connect professional microphones, headphones, and studio monitors.
I’m using the Focusrite Scarlett Solo, and it’s phenomenal. I know it’s the subject of a lot of ridicule on the internet (which I also find pretty funny), but man it’s truly earned its status as one of the most popular interfaces ever.

What I love about the Focusrite interfaces are their high-quality preamps. The same preamps in the high-end Focusrite interfaces are also in the Scarlett Solos, so the sound quality is phenomenal (even at such a budget-friendly price).
The only downside of the Solo is that it only has one XLR input, so if you want to record more than one thing at a time, you’ll need a different interface.
But I’m not recording bands, I’m just recording myself, so this interface is perfect for my needs.
Headphones
Once you’ve got your audio interface set up, the next thing you need is a way to monitor the audio coming out of the interface. Here, you have two choices: studio monitors or headphones.
Ideally, you should have both, but my recommendation is actually to start with headphones. Here’s why:
- Headphones are essential for recording audio into a microphone and playing back what you hear without mic feedback.
- Headphones are more versatile, especially for listening to mixes at low volumes and in noise-restricted spaces like apartments.
- The most expensive pair of studio monitors will still sound like garbage if your room isn’t acoustically treated (more on that later). Headphones are guaranteed to sound good no matter your listening environment.
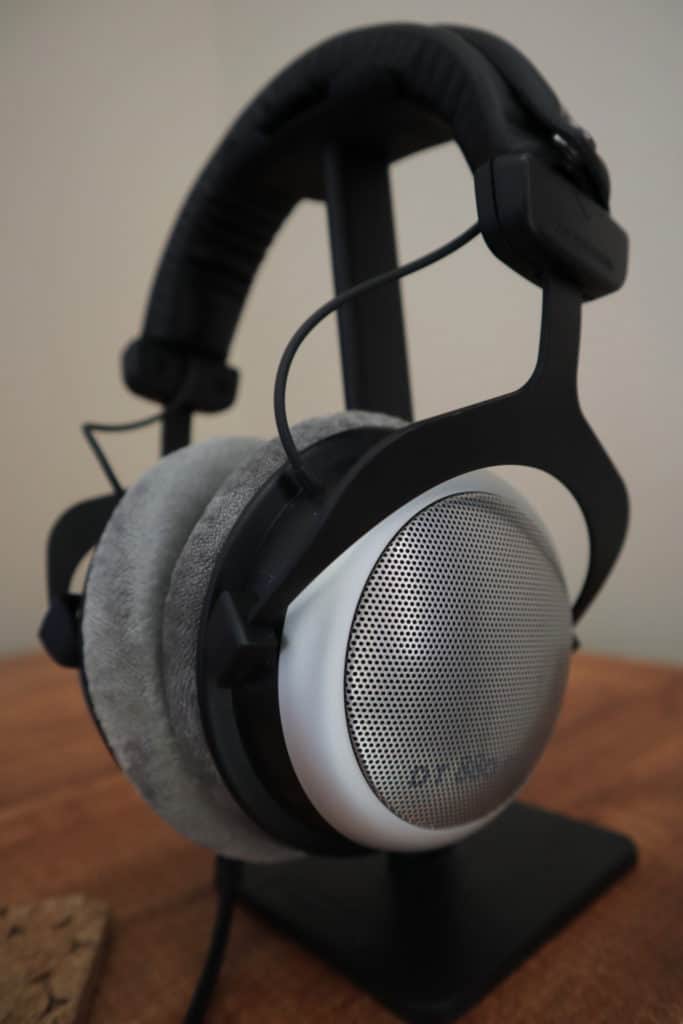
For headphones, I love the Audio-Technica ATH-M50X’s (which I cherished until they fell apart from years of everyday use), and for open-backed headphones, I like the Beyerdynamic DT880 Pro (the ones currently on my desk as of the writing of this post).
For years, I used the headphones that came with the Scarlett Solo Studio bundle (I even recorded an album using those headphones), and they worked great.
Studio monitors
Studio monitors are powered speakers designed to give you an accurate representation of the audio coming out of your interface.
The main advantage of studio monitors over headphones is that they allow you to hear the audio in the room, which can be helpful when mixing.
I bought the KRK Rokit 5s several years ago, but I actually would not recommend those monitors today. In my opinion, they’re overpriced compared to the competition.
For example, you can pick up the PreSonus Eris E3.5-3.5″ Near Fields for $100. (Yes, that’s $100 for both monitors.)
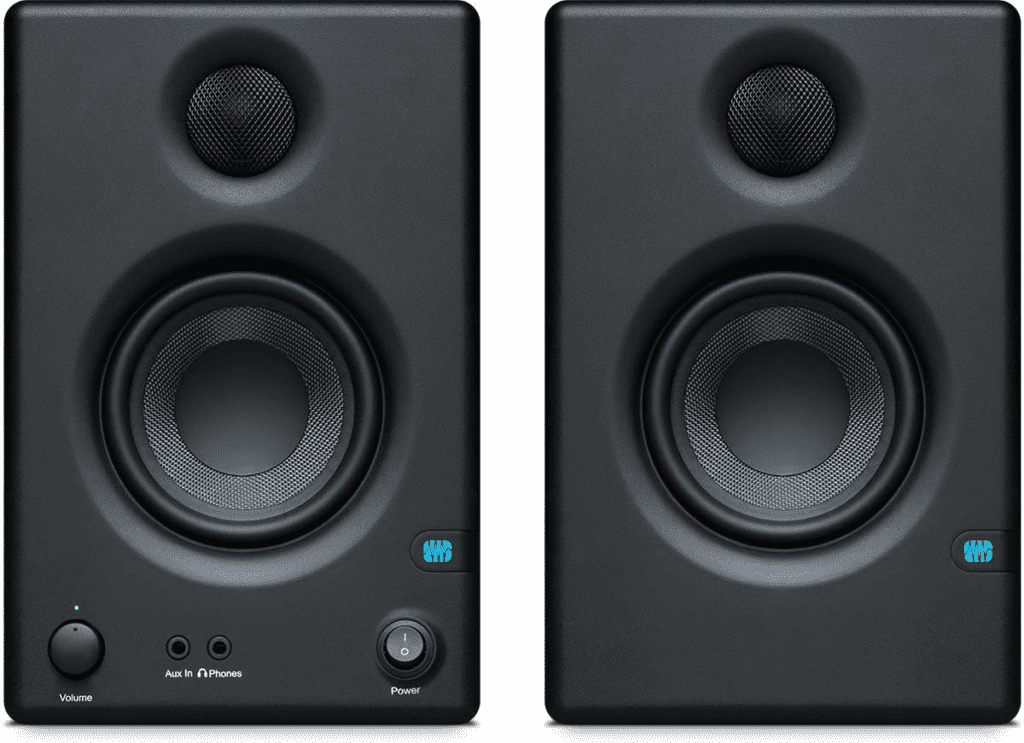
That’d be my recommendation if you want to go the studio monitor route. However, if your room isn’t acoustically treated, studio monitors won’t be much help to you.
Now, I know this is sacrilegious, but I actually detest mixing on studio monitors. I’ll do it during the mixing process because it’s a best practice, but I much prefer producing and mixing on headphones.
That’s why I use open-backed headphones like the Beyerdynamic DT880s. These cans are designed to simulate a more open and transparent stereo field while still retaining all the benefits of headphones.
(Don’t tell anyone, but I may or may not have mixed my last two commercial projects completely on headphones… and the clients loved the result.)
Microphones & microphone gear
Now that you’ve got a way to monitor what’s coming out of your system, it’s time to figure out how to get sound into your system. And for that, you need a microphone.
There are three main types of microphones: ribbon microphones, dynamic microphones, and condenser microphones.
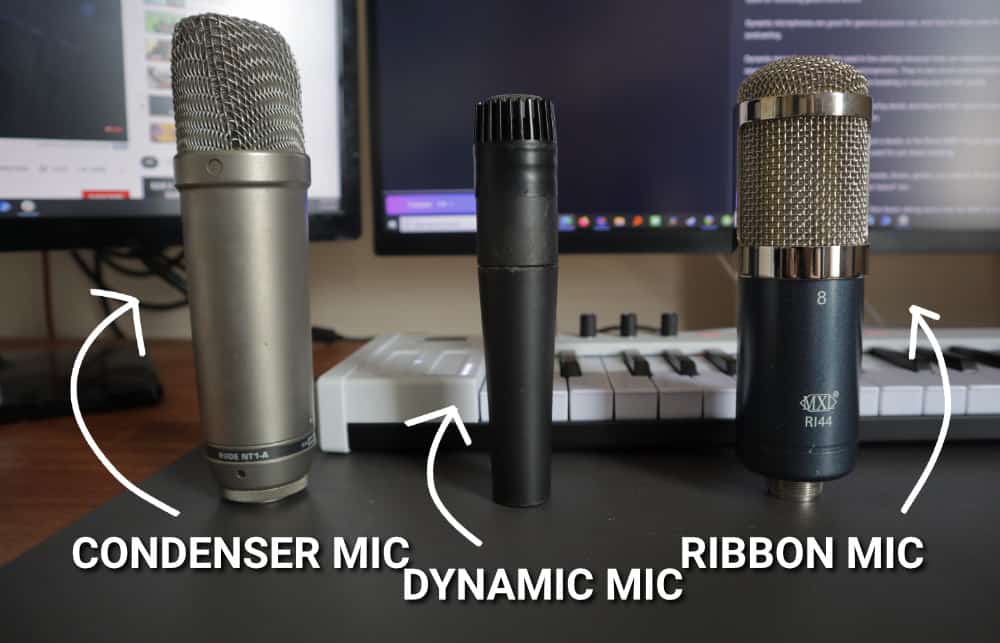
Ribbon microphones are great for capturing the natural sound of an instrument and the sound of the room. However, they’re extremely fragile (due to the physical ribbon inside of them that facilitates the sound), and can be easily damaged if you send too much power to them or drop them on a hard surface.
Therefore, they’re not at all suited for live settings or recording instruments with high signal outputs.
Dynamic microphones are good for general purpose use, and they’re often used for vocals, podcasting, and recording loud signal sources like guitar amps or drums.
They’re also extremely forgiving and don’t pick up a lot of room noise, which is ideal for folks who don’t have an acoustically treated room.
Dynamic microphones are often used in live settings because they can tolerate a much higher sound pressure level than condenser microphones. They’re also much more durable and can be mishandled and dropped for years without breaking or losing any of their quality.
Probably the most popular dynamic microphone is the Shure SM58. Anytime you’re at a concert and you see a microphone with that classic rounded metal grill, chances are it’s an SM58.
Condenser microphones are great for capturing detail, and they’re often used for recording intimidate, up-close vocal performances, and lots of room sound.
They’re also the ideal choice for recording acoustic guitar because of how much detail and warmth they capture.
Which microphone should you buy first?
The first microphone you should buy, without a doubt, is the Shure SM57. It’s an industry-standard dynamic microphone that can be used for just about anything.
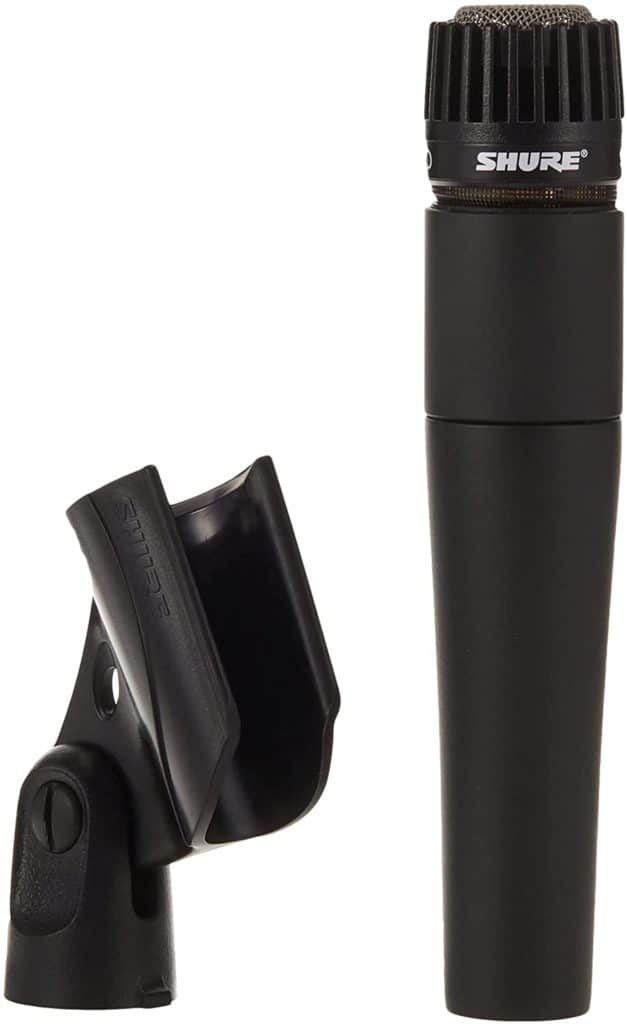
You can get away with using the SM57 for vocals, drums, guitars, you name it. It’s an incredibly versatile microphone. It’s my ultimate “desert island” mic.
When I need to capture more of the room sound or detail in my voice (or instruments), I pull out my condenser mic.
I’m a big fan of the Rode NT1-A, which is a large diaphragm condenser microphone. It’s incredibly affordable, it sounds great, and it’s perfect for my needs.
You’ll also need a pop filter to avoid plosives (the “p” and “b” sounds that can cause a mic to distort).
Lastly, you’ll need a way to hold your mic. I like using boom mic stands or desk mic stands.
With condenser mics, you’ll also need a shock mount. Every bump or wiggle of the capsule in a condenser mic will cause “boomy” sounds and potentially ruin your sound.
If you buy this Rode NT1A kit, you’ll get an included shock mount. Otherwise, you’ll need to buy one separately.
Instruments
One of the best ways to help your music come to life is to get “outside the box” and use real instruments.
Before I started recording and producing music on my computer, I played guitar and piano in several bands, starting in high school.
Before that, I got my start playing bluegrass and folk music with my family in the swampy panhandle of Florida (which is basically South Alabama).
My most comfortable instrument is the acoustic guitar, so whenever I can, I like to inject those sensibilities into my musical projects, whether they’re folk songs or electronic dance tracks.
Breedlove USA Concert Moon Light
This Breedlove is an awesome-sounding acoustic guitar that I got on clearance at Guitar Center. I’m in love with this thing.
I put Elixir lights (12/53) on this guitar and it sounds perfect.
You can hear this guitar in action in my video about the best chord progressions in video games:
Yamaha P45 Digital Piano
The Yamaha P45 is a cost-effective way to get 88 fully-weighted keys into your home studio (if you’re into that sort of thing).
Plus, you can’t get much better than Yamaha in terms of brand reliability and durability. One of my family members purchased a similar digital piano from Yamaha 20 years ago. It still plays like the first day they bought it.
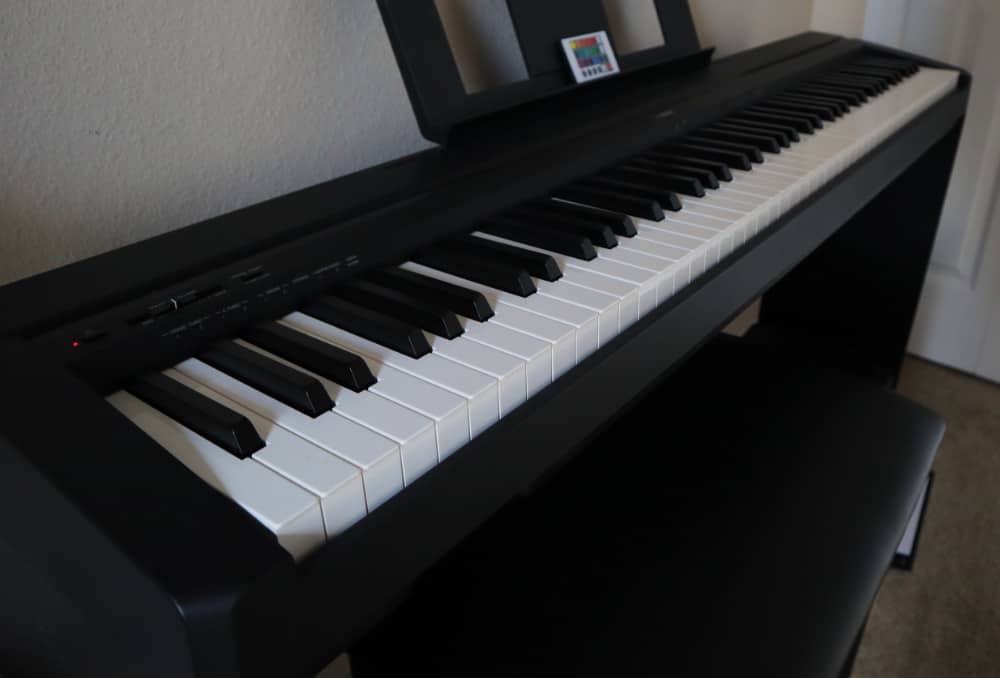
My only complaint is that it’s got a very large footprint and takes up a large portion of my home office/studio.
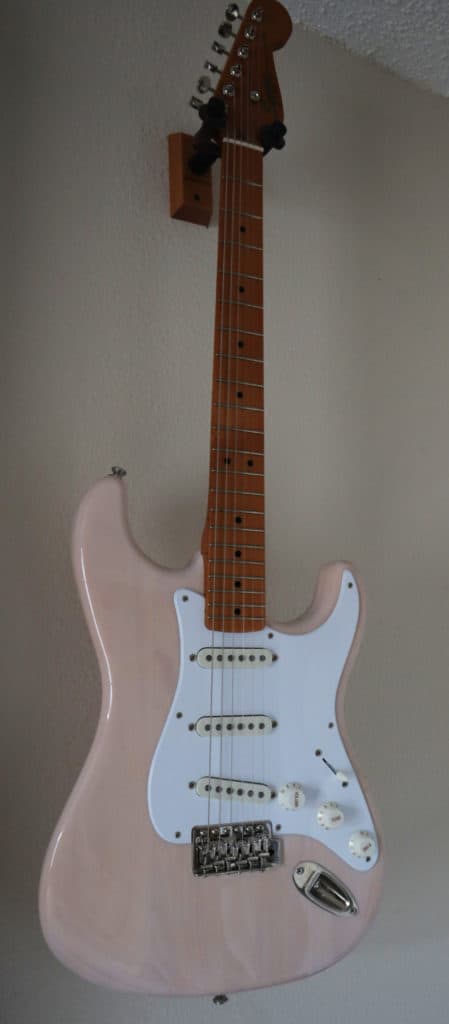
Squier Classic Vibe ’50s Stratocaster (White Blonde)
I spent weeks doing research on electric guitars before finally deciding on this Squier. I’m really happy with it.
It’s got a great vintage vibe and the sound is really clear and articulate, thanks to the three single-coil pickups.
I also love the five-way pickup selector, which gives you a lot of tonal options.
And by the way, I am convinced there is no fundamental difference in audio or build quality between the modern Squier lines and Strat lines (fight me).
90% of your tone is your technique, your strings, and your signal chain/amp.
Maybe true professionals with highly-tuned ears can hear the difference, but when most of my guitar tracks are deep in a mix, there’s no point in shelling out that extra cash just to have the Fender name on the headstock.
This thing sounds beautiful and looks awesome hanging on my wall.
Boss Katana-50 MkII 1×12 inch 50-watt Combo Amp
The Boss Katana is one of the best-sounding amps I’ve ever owned, and it’s incredibly versatile.
It’s got five different amp types built-in, plus a host of other features like delay, reverb, modulation, etc. You can also hook it up to your computer via USB and use it as an audio interface.
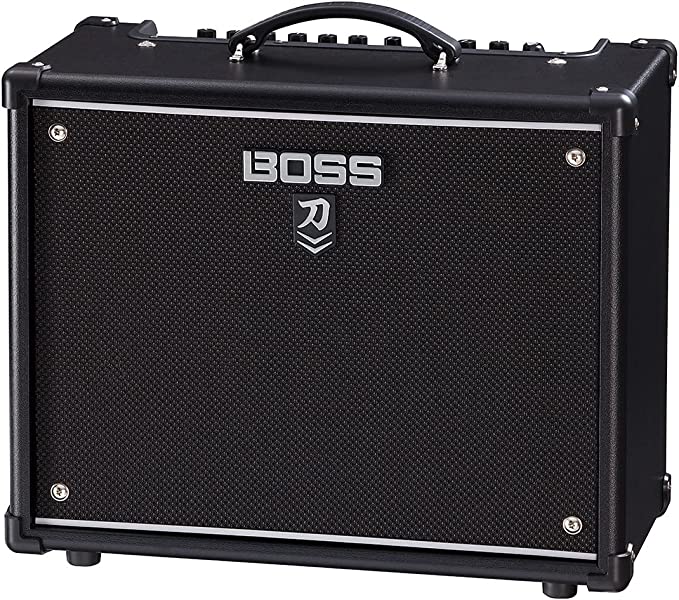
I highly recommend checking out the Katana if you’re in the market for a new amp. Just make sure you get the MkII version, as it’s a significant upgrade over the original.
Miscellaneous percussion
If you’re not a trained guitarist or pianist, you can still breathe life into your tracks by using real percussion like a tambourine or shaker.
For that reason, I like to keep a few miscellaneous percussion instruments around, such as some egg shakers, some wooden spoons my mom got me for Christmas, and a tambourine.
Audio Software
In 2022, almost every sound can be achieved “in the box” with software.
Sample libraries are becoming more and more indiscernible from the instruments they’re sampling, and plugins have never been cheaper or more accessible to new producers and composers.
Here are some of my favorite software for producing music broken down by category.
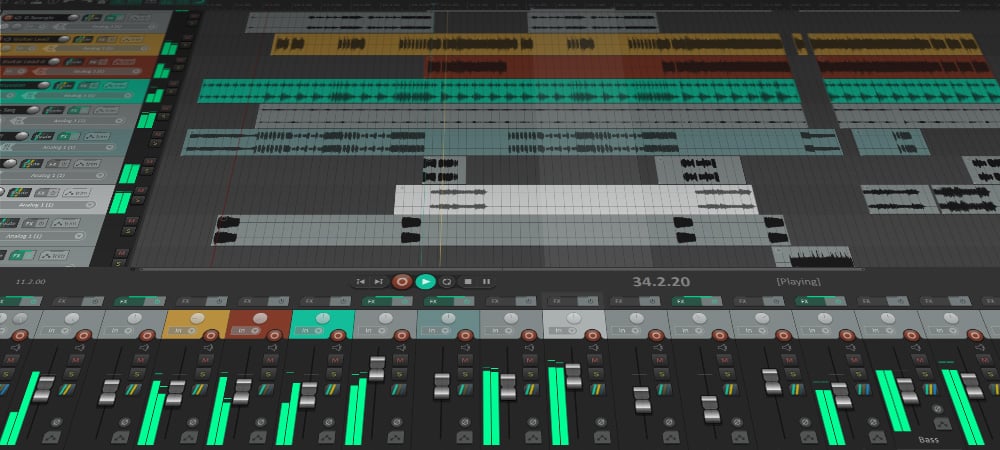
DAWs
Our first category is DAWs or digital audio workstations. This is the software you’ll use to record, edit, and mix your music.
There are so many great DAWs, and most of them do the same things, just with different interfaces and workflows. So it really comes down to what you’re most comfortable with.
I personally use Reaper because I love its flexibility, workflow, and light CPU footprint. But I’ve also used Logic, Pro Tools, Cubase, and Ableton Live (among others).
The most important thing is to pick a DAW and get started.
Video editing
A big part of building a brand like Composer Code is video editing. I’ve used Premiere Pro, Final Cut Pro, and now I exclusively use DaVinci Resolve.
DaVinci Resolve is not only completely free (yes, you read that correctly), but it’s far more stable than Adobe’s flagship video editor. It comes packaged with Fusion, a very powerful compositor and effects engine that rivals After Effects.
So, yeah, you’re essentially getting two programs for the price of… free. And it doesn’t crash on you. What’s not to love?
Audio plugins
Audio plugins are software that you can use to add effects to your tracks, emulate analog hardware, or playback sampled sounds from instruments or nature.
There are several different categories of plugins, such as mixing plugins, instrument emulation plugins, sample libraries, and utility plugins.
It’s worth mentioning that sample libraries are technically not plugins, but rather collections of pre-recorded audio files that you can manipulate and playback with a plugin (called a sampler).
Kontakt is probably the best popular sampler in existence, while the sounds that playback within Kontakt are called sample libraries.
Instrument plugins
Massive (Native Instruments)
Massive by Native Instruments is my go-to synth for basses, leads, pads, and just about any synthetic sound. It’s easy to customize, it sounds great, and it’s got a ton of presets to get you started.
Spitfire LABS
Spitfire LABS is a great (and free) option for acoustic instruments like pianos, guitars, and drums. The samples are recorded in a really nice-sounding studio, and they’re played back by some of the best musicians in the world.
Super Audio Cart
Super Audio Cart by Impact Soundworks is technically both a sample library and an instrument. It’s a collection of samples from the Commodore 64, NES, Gameboy, Sega Genesis, and Super Nintendo.
It’s also an instrument in its own right that lets you combine and manipulate those samples to create whole new, never-before-heard sounds.
Whenever I need an authentic chiptune sound (and I’m not using a tracker), I always reach for Super Audio Cart.
Fun fact: I actually composed the entirety of the One Gun Guy soundtrack using Super Audio Cart. Check out my full breakdown of the soundtrack in this video:
Guitar Rig 6 (Native Instruments)
Guitar Rig 6 by Native Instruments is another one of my favorite plugins. It’s an amp simulator that lets you turn your clean guitar signal into just about any distorted or outlandish guitar sound you can think of.
It’s great for getting those huge, arena rock sounds without having to mic up a million different amps. Just plug your guitar into your audio interface, run your guitar through Guitar Rig and you’re good to go.
Samples
Over the past year, I’ve used Arturia Analog Lab V almost exclusively for all of my keys sounds.
It’s a huge collection of keyboard instruments, both acoustic and electronic, that are all beautifully sampled and sound great.
I highly recommend it if you’re looking for a one-stop shop for all your keyboard needs.
Spitfire Albion One is my go-to sample library for epic, cinematic sounds. It’s got a ton of great-sounding instruments, from huge horns to beautiful strings, and it’s all very easy to use.
Kontakt 5 Factory Library is another great option for samples. It’s a huge library of sounds that covers just about every instrument imaginable. And, best of all, it’s free if you already own the full version of Kontakt.
If you want to dig deeper into Kontakt libraries, check out my posts on the best Kontakt libraries and best cinematic Kontakt libraries.
Utility plugins
Komplete Kontrol by Native Instruments is one of those plugins that, once you discover it, you wonder how you went your whole life without it.
It’s essentially a plugin that gives you control over all of your Native Instruments plugins from one central interface.
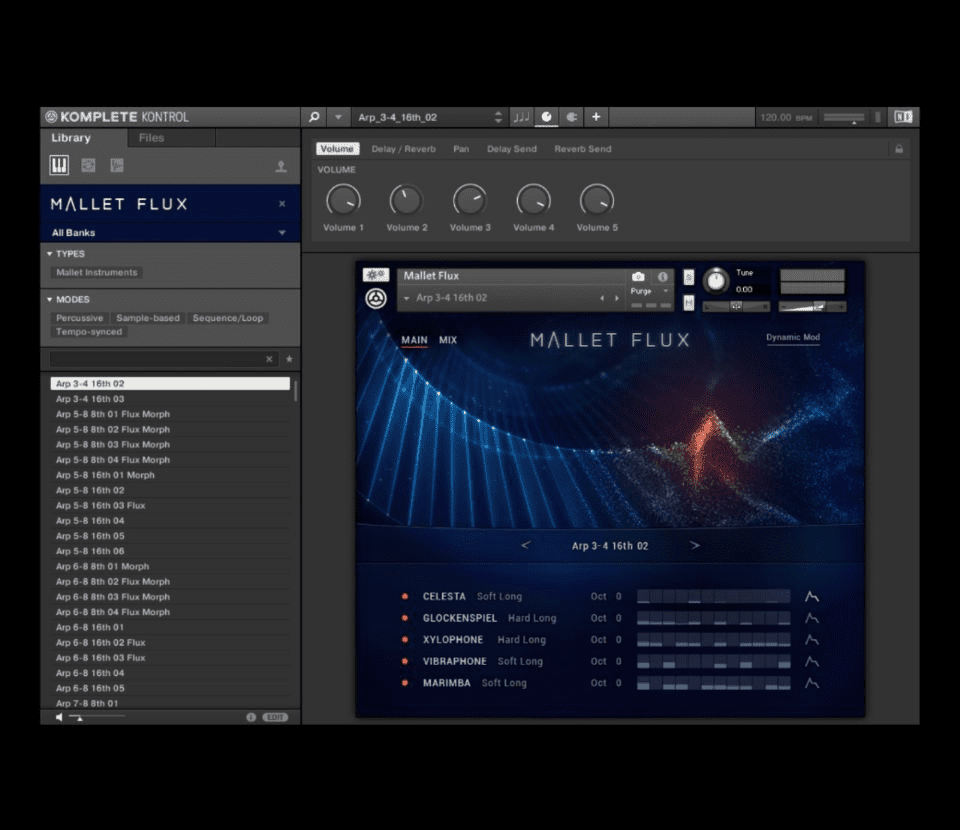
So, if you’ve got a bunch of different Native Instruments plugins loaded up in your DAW, Komplete Kontrol lets you quickly browse through them and find the sound you’re looking for without ever having to open up each individual plugin.
It’s a total game-changer, and it’s made my workflow a lot faster and more efficient. This way, when I need a certain sound, I can just select a characteristic (such as “brassy” or “percussive”), and Komplete Kontrol indexes all of the sounds in my library that fit that description.
It’s an invaluable tool, and I can’t recommend it enough.
Mixing plugins
Plugins can also emulate mixing equipment, such as compressors, EQs, and reverbs.
I tend to use a lot of Waves plugins for mixing, as they sound great and are very versatile. But in hindsight, I would’ve spent less money on Waves plugins and more time on the free stock Reaper plugins. Why?
Because mixing techniques are best learned by starting with the basics, the stock DAW plugins are more than powerful enough to get you started.
That said, here are some fancy-pants mixing plugins that I love.
Vocal Rider (Waves)
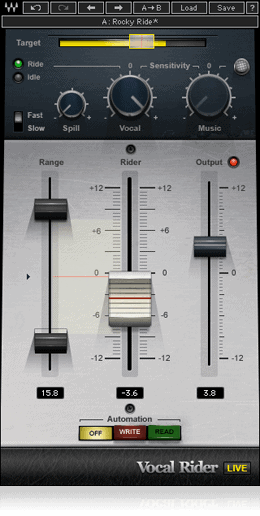
When it comes to mixing vocals, engineers often utilize an age-old technique at the very beginning of their mixing workflow called “riding the faders.”
This is where they manually adjust the fader up and down based on the vocal performance to even out the levels.
It’s a tedious process, but it’s essential for getting a great, consistent vocal sound.
Fortunately, Vocal Rider does this process automatically.
As you play through the vocal track, it “rides” the fader for you. All you have to do is set a few parameters (such as the desired level) and it does the rest.
It’s not perfect, but it’s a huge time-saver, and it can really help even out a sometimes-inconsistent vocal.
CLA Suite (Waves)
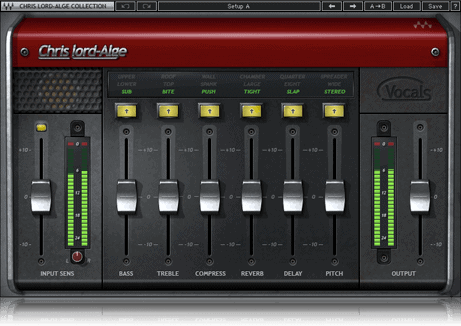
Chris-Lorde Alge (hence the name CLA) is a legendary mixer, and Waves has created a suite of plugins that attempt to capture his mixing style.
The CLA suite includes four different plugins: CLA Vocals, CLA Guitars, CLA Drums, and CLA Bass.
Each plugin contains a number of presets that are meant to replicate Chris-Lorde Alge’s signature sound, and they actually do a pretty good job.
I don’t like to use these for professional mixing work, but if I need a “quick and dirty” mix for YouTube or to show a client, I reach for my CLA plugins.
H-Comp (Waves)
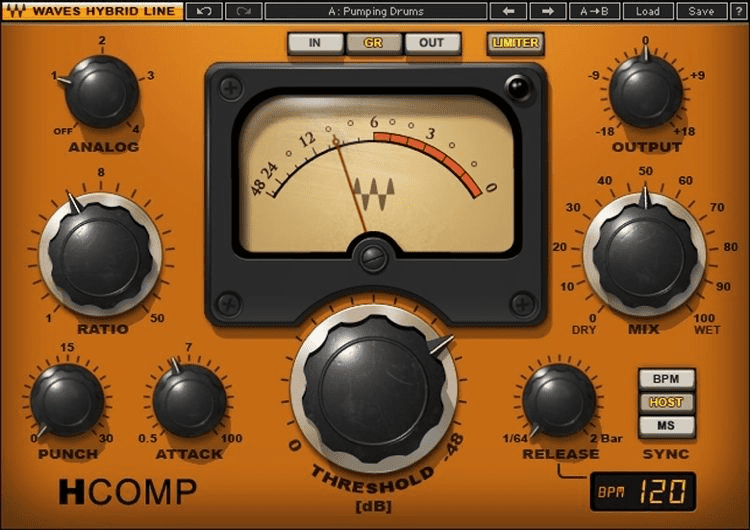
H-Comp is a hybrid compressor that combines the best aspects of digital and analog compressors.
It’s got a beautiful, vintage sound, and it’s very versatile. I simply don’t use any other compressor. I also love the “auto” mode, which automatically adjusts the attack and release based on the input signal.
H-Delay (Waves)
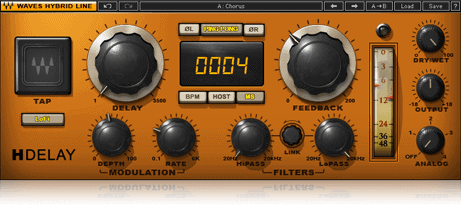
The H-Delay by Waves (the sister plugin of the H-Comp), just happens to be my favorite delay as well.
The H-Delay plugin is a great delay plugin that offers a lot of flexibility and control. Some of its notable features include:
- A vintage sound that harkens back to the days of analog delays.
- A wide range of delay times, from very short delays to long delays that can create interesting textures.
- Control over the stereo field, so you can create wide or narrow delays.
- A “Freeze” function that allows you to capture a moment of the delay and repeat it endlessly.
This plugin is great for everything from subtle echoes to crazy, out-there sounds, and I highly recommend it.
L1 + UltraMaximizer (Waves)
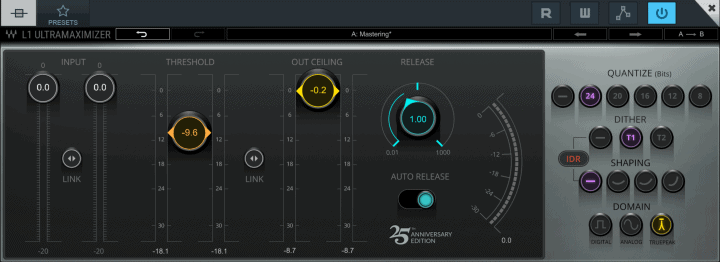
The L1 + UltraMaximizer plugin is a combination of two plugins: the L1 limiter and the Waves UltraMaximizer. The L1 limiter is a great, transparent limiter that can be used to increase the overall level of a mix without destroying the dynamics.
The L1 + Ultramaximizer plugin is a combination of two plugins: the L1 limiter and the Waves UltraMaximizer. The L1 limiter is a great, transparent limiter that can be used to increase the overall level of a mix without destroying the dynamics.
The Waves UltraMaximizer is a plugin that can be used to add loudness and clarity to a mix. It’s often used as a “secret weapon” by top mixers, as it can really help a mix cut through the noise and sound its best.
The L1 + UltraMaximizer plugin is a great all-in-one solution for adding level and clarity to a mix, and you’ll rarely find me without an instance of this plugin on my Master Buss.
Renaissance Reverb (Waves)
Reverb is an essential part of any mix, and the Waves RVerb is my go-to plugin for adding space and depth. The Renaissance Verb has a beautiful, warm sound, and it’s very versatile.
It can do everything from small room sounds to huge, epic reverbs.
I also love the “Freeze” function, which allows you to capture a moment of the reverb and repeat it endlessly. The Renaissance Verb is an essential plugin for any mixer, and I can’t recommend it highly enough.
These are just a few of my favorite plugins, but there are literally thousands of great plugins out there. The most important thing is to find the plugins that work best for you and your workflow.
And while spending money on new plugins is certainly fun, I’d highly recommend spending some time learning the basics with your DAW’s stock plugins before you max out your credit card on a Black Friday sale.
Workspace

My workspace is just as important as my gear. If I don’t enjoy sitting down in my space, I’m not going to be motivated to create there.
My workspace is simple (it’s nothing you’ll find on a home office Pinterest board), but it gets the job done and keeps me creative.
Desk
I’m a huge fan of big, spacious desks. Last year, I decided to upgrade my desk to a simple, solid wood block held up by Ikea Alex drawers.
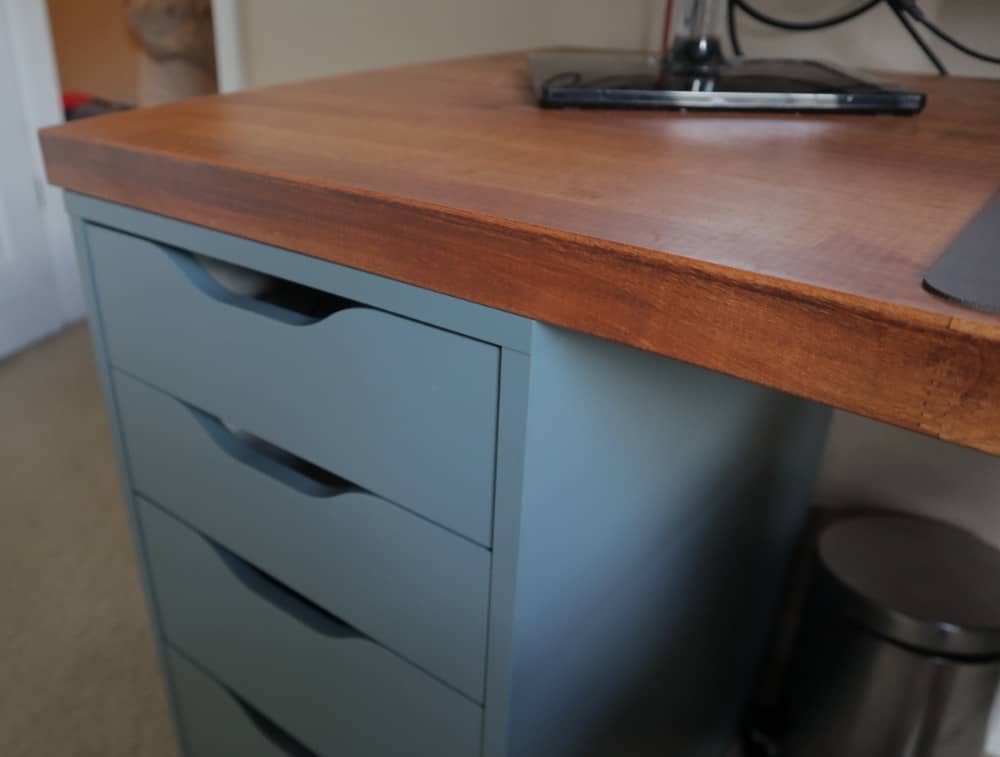
(If you do any amount of research into home office or studio setups, this is a very common one.)
I purchased the wood block from Home Depot, sanded it, stained it, and sealed it with polyurethane.
The desk is really heavy, so it didn’t need to be mounted or secured. I just rest it on these two Alex drawers from Ikea. And that’s it!
Monitors
I’m not really a monitor snob and I don’t do a lot of high-end gaming on my PC (mostly indie games).
Therefore, I wasn’t looking to shell out huge money for one of those curved monitors. But as someone that works from home, I was really starting to feel the strain of looking at 1080p text all day.
So, I recently upgraded to an LG 4k 32″ display and I absolutely love it, especially when coupled with my backup Samsung 1080p monitor on the side.
Acoustic treatment
Most home office spaces are not set up to be ideal recording environments. They have hard corners, flat walls and floors, and ugly acoustic reflections.
Many home studio newbies hear the sound of their room in their recordings and assume they need to upgrade their gear, believing that a more expensive microphone, audio interface, or DAW would fix their problems.
Chances are, you’ll hear significant improvements by upgrading your acoustic treatment before upgrading your microphone.
The subject of acoustic treatment deserves its own blog post, but to get you started, listen to this MasterClass by the legendary producer Bobby Oswinksi on the importance of acoustic treatment and how it all works.
Here are three ways I’ve combated ugly reflections in my home office and created a pretty great recording environment (if I do say so myself).
Bookshelves
Have you ever wondered why libraries are so quiet? No, it’s not because they enforce silence with militant zeal. It’s because books are some of the most effective sound absorbers and diffusers in existence.
If you’re looking for a quick and dirty fix to acoustic treatment, here it is (and it’s backed by science): buy a bookshelf and fill it with books.
If you don’t have books, go to your local Goodwill and pick them up for pennies on the dollar. Just be prepared to answer some questions as to why you have 34 different types of romance novels on your wall.
Corners are usually the biggest culprits for creating unpleasant reflections, so I’ve filled most of the corners of my office with books or furniture.
Curtains
I know it’s crazy, but the biggest discernible difference I had in my home studio is when I replaced the blinds with curtains. They absorb so much sound that used to reflect off my tall, glass windows.
This is another cheap, quick way to give your room some acoustic treatment.
Also, I have a carpeted office, but if you’re working with hardwood or tile floors (God bless you), you’ll definitely want to invest in a big rug.
Custom-built acoustic panels
I went through a woodworking phase during the pandemic, and I couldn’t think of a better thing to create than custom acoustic panels.
I roughly followed this tutorial and filled each panel with rock wool. I then lined them up around my office. I’ve since sold a few of them (I used to have 8, which was way overkill for my space), and now I just have three.
I mounted them using simple hardware from Home Depot.
My recommended beginner setup
If you’re just starting out, here’s the setup I’d recommend (I’m assuming you have a computer).
Scarlett Solo 3rd Gen Home Recording Bundle ($269)

This bundle comes with a microphone (which is actually not bad), a mic stand, shock mount, boom arm, pop filter, and headphones (plus all the cabling you need).
This is the bundle I started out with, and the best thing is that it’s entirely modular – as you outgrow your equipment, you can upgrade piece-by-piece.
MIDIPLUS AKM320 USB MIDI Keyboard Controller, Black, 32-key ($41.99)
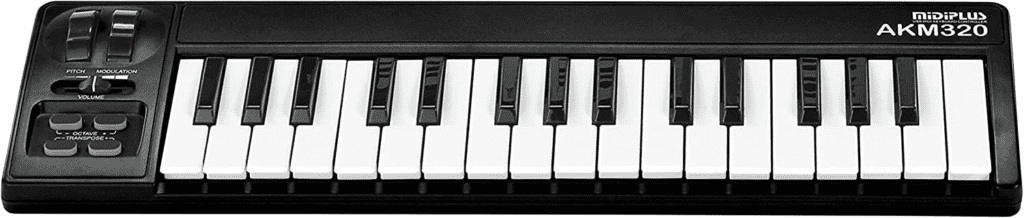
Say what you will about MIDIPLUS, this humble Chinese brand makes some of the best MIDI controllers I’ve ever used.
I used this smaller MIDI controller before upgrading to my current 49-key controller. It’s awesome.
This bundle also includes Ableton Live Lite (normally $99), so you don’t even need to purchase a DAW.
And that’s literally it!
For less than $350, you can have everything you need to:
- Record audio
- Playback and monitor that audio
- Play MIDI instruments
- Produce music with stock plugins in Ableton Live Lite
What a time to be alive! Take it from me, someone who’s produced and composed professionally and has a lot of fancy gear, you could absolutely get by with this setup.
Conclusion
You don’t need to spend a fortune on equipment or go into debt to have a great home studio.
If you’re just getting started, my best advice is to keep it simple and focus on the things that will make the biggest difference:
- An audio interface
- Headphones
- A microphone
- A DAW (Reaper is free for 60 days!)
- A MIDI controller
- Some organic acoustic treatment for your room
You can do a lot with just these five things, and assuming you have a computer, you can get up and running for less than the price of a tank of gas in 2022 (heh, almost).
Happy recording!