In this tutorial post (and accompanying video), I’m going to show you six ways (most of them free) to create authentic 8-bit chiptune music.
When I say “8-bit,” I mean music produced by the sound chips of the NES, GameBoy, and Commodore 64.
At the end of this post, I’m also going to give you some compositional tips to make your 8-bit music production even better.
And if you’re looking for a guide on the fundamentals of how to become a video game composer, click the link to check out my comprehensive guide on the topic.
Table of Contents
Why is it called 8-bit music?
Nobody really knew what a “bit” was when Sega and Nintendo were battling over market dominance in the early ’90s. All we knew is the more bits you had, the better.
As it turns out, 8-bit music has nothing to do with the resolution of the music itself but is so named after the chips found in early video game consoles. The higher the “bit” number, the more data could be processed at a single moment.
As you well know, we have 8-bit consoles, 16-bit consoles, 32-bit consoles, and the iconic console named after its own bit count, the Nintendo 64.
After that, I think we gave up on counting bits.
Now, 8-bit music is a moniker used to reference music created in the style of those sound chips, often used interchangeably with “chiptune.”
Retro resurrection
8-bit music production has made a significant resurgence in the past decade with many high-profile indie games utilizing it as their main sound palette.
Apart from games, there’s a thriving chiptune community that enjoys making this kind of music just for fun.
So let’s talk about how you can do that, too.
Method #1: How to make 8-bit music with a VST
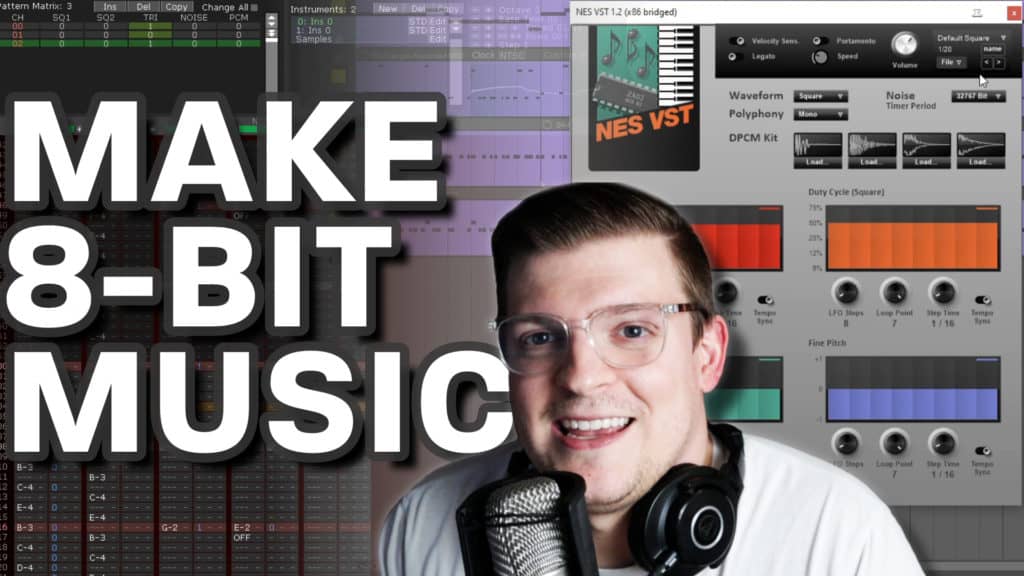
The first method for making 8-bit music is to use a free VST instrument inside of your digital audio workstation. I’m using Reaper for my digital audio workstation and this NES VST is the best one I’ve found on the web.
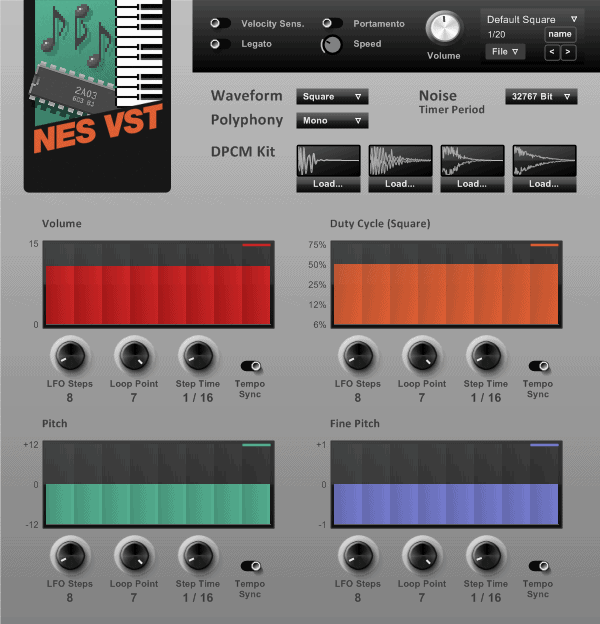
Now if you’re wanting to make music that “sounds retro” and not looking to emulate a particular console or sound chip, this is a great way to do it.
But, in my experience, it’s more fun to impose limitations on yourself and create something that could have been played on the NES or GameBoy or Commodore 64.
In this case, you’ll want to do a little bit of research on the sound chip you’re trying to emulate because there are some major differences.
For example, the NES has five sound channels:
- Two square wave channels.
- A triangle wave channel.
- A noise generator channel.
- And a DPCM sample channel.
Which plays very, very low-quality samples, like the iconic bongo sound from Super Mario Bros 3.
Click above to skip right to the NES VST portion of the video tutorial!
The GameBoy had a different setup, as well as the Commodore 64.
The benefits of using a VST plugin are as follows:
- It’s easy to pick up and play, especially if you’re already familiar with your DAW.
- It allows you to extend beyond the limitations of the original sound chips and create “hybrid” sounds.
- You can bring in outside effects and automation parameters to create new and interesting sounds.
Method #2: How to make 8-bit music with a music tracker
We don’t have access to the original software composers in the NES-era used, but a tracker is about as close as we can get to replicating it.
A music tracker is an application that emulates how retro chip music was composed in the 80s and 90s.
I recommend Deflemask, which has both a free and paid version. For what it’s worth, I composed an entire game soundtrack with the free version.
At first blush, Deflemask looks pretty primitive. It’s got simple colors, a weird spreadsheet layout, and a UI that looks straight out of MS-DOS.
To me, this is part of its appeal. It’s a bit foreign if you normally work in a DAW. But after a while, I found myself working in Deflemask just as fast as I would in any modern music-making application.
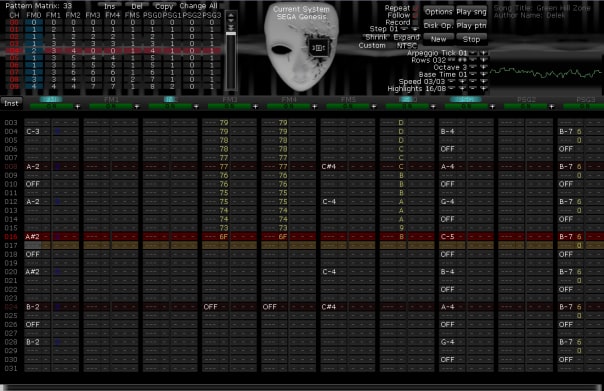
Deflemask also includes a wide swath of old-school sound chips, all with their particular quirks and limitations.
These include:
- Sega Genesis/Mega Drive
- SEGA Master System
- Nintendo Game Boy
- TurboGrafx-16
- Nintendo NES
- Commodore 64
- Arcade System (SEGA X/Y boards)
So whatever vintage sound you’re going for, chances are, Deflemask can accommodate you.
Check out my video above to hear a completed track composed in real-time!
As far as I’m concerned, Deflemask is the best of the best. That said, some other great music trackers are MilkyTracker and FamiTracker.
Both of these will let you create authentic-sounding 8-bit chiptune.
Method #3: How to make 8-bit music in Beepbox
Beepbox is a powerful, browser-based online chiptune maker with a special emphasis on making 8-bit and chiptune music. The layout of the application is one part MIDI editor, one part sequencer, and one part music tracker.
The large window on the left is your workspace, where you’ll place notes similar to how you’d edit MIDI in a DAW. The section below that is your pattern editor. Much like Deflemask and other trackers, you can create a single pattern and have it repeat multiple times, or click the numerical buttons to cycle through patterns.
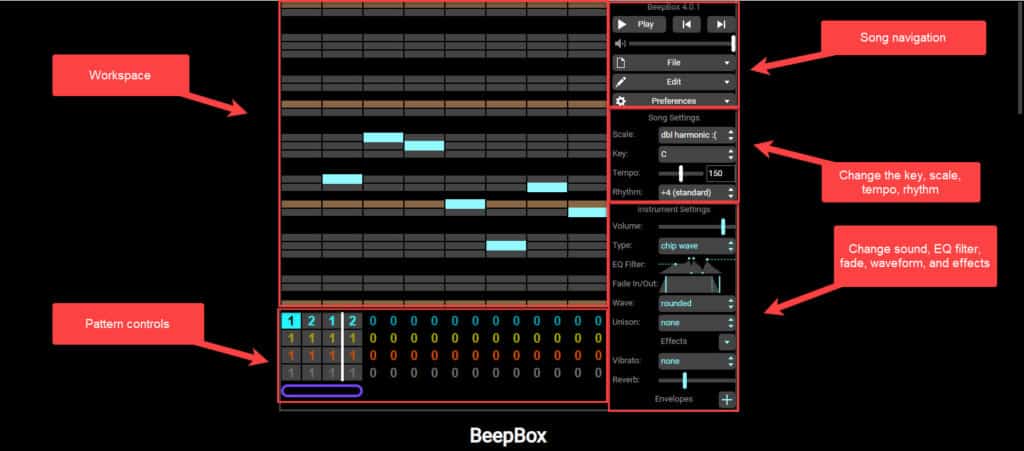
Once you hit Spacebar to play, the patterns will repeat (much like a sequencer), or play through a designated pattern length. The pane on the right lets you tweak the settings of your workspace and instruments.
While it lacks the more advanced features of a full-fledged DAW (you’re limited to four simultaneous layers, for example), I was blown away by what’s possible in a simple browser-based application.
For a full tutorial on the software, go to Beepbox.co and read through the detailed instructions.
Method #4: How to make 8-bit music in GarageBand
GarageBand is a free, Mac and iOS-exclusive DAW. As of the time of this writing, GarageBand has VST support. Therefore, you’re able to download the aforementioned NES VST plug-in and use it within GarageBand.
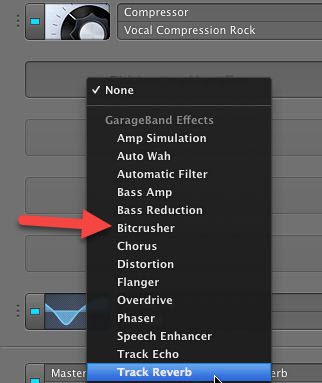
If you don’t want to download the plugin, you can always use one of the stock electric piano sounds and apply a heavily distorted Bitcrusher effect. While this isn’t “true” chiptune, it’ll provide that crunchy 8-bit sound in a pinch.
Method #5: How to make 8-bit music in FL Studio
FL Studio is a popular DAW among game composers and producers, including my buddy Alec Weesner. I’m not an FL studio user myself, but here’s a solid tutorial video on how to make 8-bit music in the application:
Method #6: How to make 8-bit music in MuseScore
If the sight of a MIDI editor makes your skin crawl and you’re more of a sheet music person, you can still make 8-bit music for free with MuseScore. MuseScore is an open-source musical notation software.
Once you’ve composed your piece (or prior to composing), you can use the built-in MuseScore chip synthesizers or download a SoundFont to achieve those signature chiptune sounds.
To use the built-in MuseScore sounds, click View > Mixer and click the dropdown for sound. Scroll down until you see “Sine Lead” “Saw Lead” and “Square Lead.”
Now, if you really want to take a trip down nostalgia lane, you can download and install a SoundFont with the real samples used in classic retro games. Installing SoundFonts in MuseScore is simple.
First, download the SoundFont of your choosing and drop it in this directory (or Mac-equivalent directory if you’re on an Apple computer):
C:\Users\[User]\Documents\MuseScore3\SoundFontsThen, restart MuseScore. After the restart, load up a piece and click View > Synthesizer. Go to the Fluid tab and click Add in the bottom right-hand corner.
You should see your newly-downloaded SoundFont as an option.
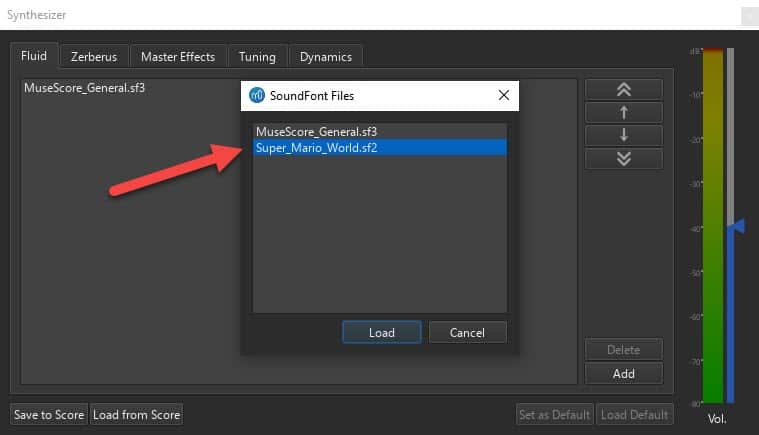
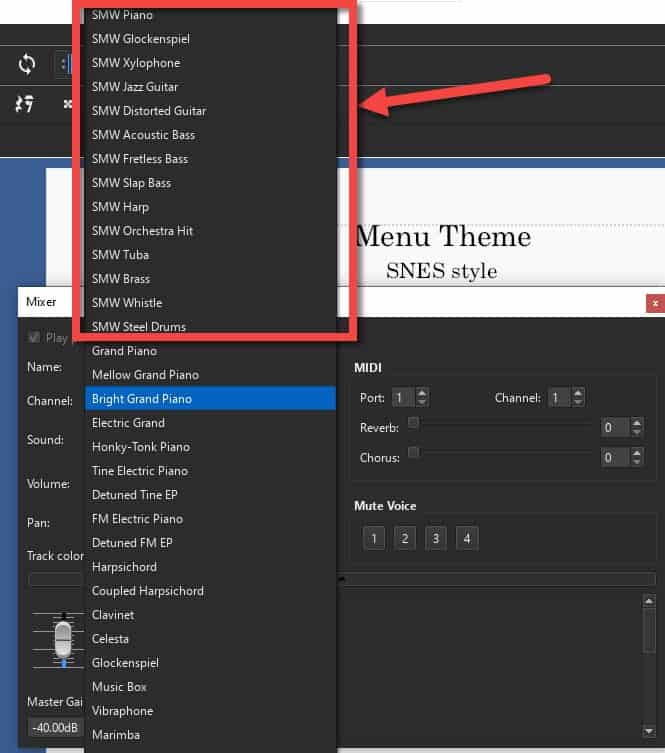
Load that sucker up and click “Set as Default.” Once you do that, you now have access to all the instruments in that particular SoundFont. To navigate between instruments, click View > Mixer and assign instruments to each staff. It’s that easy!
Tips for Composing 8-bit Music
1. Get creative with implying harmony
The limitations of many vintage sound chips make it impossible to voice four-note chords simultaneously.
For example, the NES only has three melodic voices (if you’re not using the DPCM sample channel for melody).
There are (at least) two viable ways around this, however:
- Drop the fifth of the chord. The fifth of a given chord is the most expendable chord tone. It exists only to support the root note and doesn’t “identify” the chord in any way. Koji Kondo famously did this a lot in his Super Mario Bros. soundtrack for the NES.
- Use arpeggios. Just because you can’t voice four tones at once doesn’t mean you can’t imply lush and interesting harmonies with arpeggios or “broken” chords.
2. Get creative with effects
One of the best ways classic game composers offset the limitations of vintage hardware is through effects.
Deflemask in particular offers some really cool ways to modulate and manipulate sound. These include, but aren’t limited to:
- White noise washes
- Portamento slides and glides
- Glitchy arpeggios
- Bass drum emulation by pitch-shifting the triangle channel really fast (listen in my example track for this)
3. Think in counterpoint
If you’re a folk musician like me, you’re probably used to playing chords on a guitar and singing. Or, maybe, you’re a pianist that’s used to playing chords with your left hand and playing the melody with your right hand.
When composing 8-bit music, it’s helpful to think not in terms of chords and melody, but individual voices.
Contrapuntal music, like that found in church hymns or Bach’s work, is a great example of the mindset of a great 8-bit composition.
Each voice is independent of the others, yet supports them. The soprano, alto, tenor, and bass voices are all moving in supportive, interweaving ways that create an interesting and at times “regal” sound.
I highly recommend checking out some free Bach scores on IMSLP.org or getting your hands on an old church hymnal.
If you really want to hone your counterpoint skills, practice by implementing these pieces into Deflemask or your music tracker of choice.
4. Don’t compose in the tracker at first
Composing inside a tracker on your very first go-round is a recipe for overwhelm.
My recommendation would be to compose a simple melody (or use existing melodies as I mentioned in the previous point) in your DAW and then implement it into the tracker.
Once you’re comfortable doing that a few times, it’s really fun to go into the tracker totally blind and see what happens.
Nine times out of ten you’ll create things you didn’t know were possible in a DAW.
Next Steps
If you’re ready to start your journey to becoming a game composer, be sure to check out my podcast episodes with industry leaders and my comprehensive guide on how to make game music.
Happy composing!