How to make more music by consciously streamlining the way you work
Before I dropped out of college, I was on track to become a journalist. I’ve always loved writing, and to this day it remains a large part of my day job.
One of the most intimidating things in the world to a writer is a blank piece of paper. It represents endless possibilities, but also endless opportunities to fail.
The same principle applies to a composer and a fresh session in their DAW or blank sheet of staff paper. Where on earth do you start?
If you’re paralyzed by indecision on how to start (or finish) a composition, it will inevitably slow down your speed, and perhaps discourage you from creating altogether.
This is where the idea of workflow comes in. Usually, dictionary definitions of these sorts of terms aren’t very helpful, but I find this one to be spot on:
“The sequence of industrial, administrative, or other processes through which a piece of work passes from initiation to completion.”
The more we can standardize our workflows, the faster our work can pass through the “initiation” phase to “completion.”
So what’s the best way to develop our “sequence of processes” as the definition describes? You already know how much I love stealing, so you probably know what I’m going to say: copy the workflows of professionals.
Workflows of the Pros
I’m fascinated with the workflows of professional composers (and the rituals of high performers in general).
Some of my favorite memories on Composer Code are hearing my guests describe, in detail, how they work.
Below, I’ve listed some of the particularly helpful tactics I’ve picked up from my guests and from my own experience composing music. Maybe, after reading this blog post, you’ll take bits and pieces from each composer and “Frankenstein” your workflow together.
Maybe you’ll find something to tack on to your existing workflow. Perhaps you’ll copy somebody’s exact workflow whole-hog (no shame in that).
Either way, I hope these insights help you compose faster, more efficiently, and more frequently.
“Big Picture” Composition Workflow Principles
Composition before sound design
Almost everyone I interviewed shared some variation of this sentiment. Sometimes, starting with a sound can be advantageous. There have been a few times where a particular sample has inspired me and informed the way I compose.
However, most of the time, I believe it’s best to start with the core composition elements (form, key, chord progression, melody, harmony, rhythm) before moving on to tweaking sounds and samples.
One of my favorite ways to do this is to get “outside the box” and go to a real instrument like a guitar or piano. Without any pressure, I’ll just let the composition ideas flow in their rawest form.
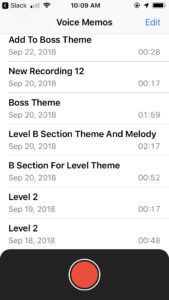
I’ll piece together notation sketches with my Voice Memo recordings to bring the composition to a point where it’s ready to be recorded into my DAW.
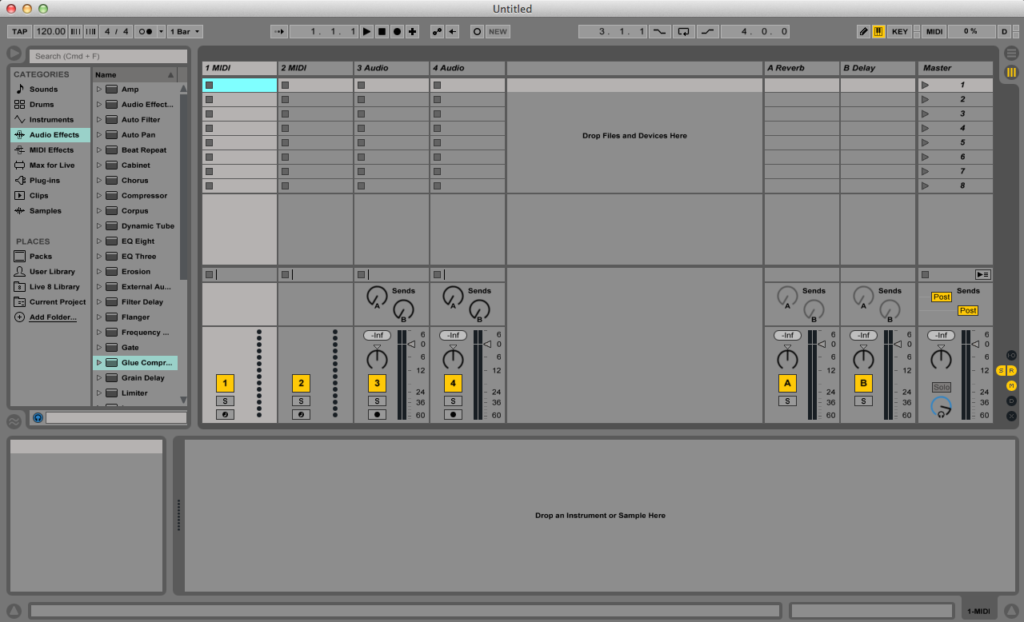
If you don’t have an instrument to noodle on, a great practice is to build a template in your DAW with a simple piano sample instrument (here are a few free ones!). That way, when you’re inspired, you can fire up your DAW, hit record, and just let the ideas flow without the friction of setting up your tracks and samples.
Start with a demo, nail down the form
This principle comes straight from the recording industry.
Artists and songwriters in the mid to late 20th century didn’t have the resources we do today, so in order to “sell” themselves to producers and labels, they would record an approximation of their music, called a demo.
These demos would often include all the relevant musical data (melody, harmony, lyrics, progression, form, intro, outro, etc.) with limited or sparse instrumentation.
If possible, recording a reduced piano arrangement to a click track is probably best, depending on the composition. Sometimes, demos can take the form of vocal scatting, which happened a lot for me during my Cybarian composition process.
Often, ideas would come to me on-the-go, and I’d just bust out my phone, open up the Voice Memos app, and scat the melody idea.
I eventually took all these melody ideas and combined them into a lead sheet, which I notated in MuseScore, that gave me solid rails to run on and a complete blueprint of the tune from start to finish.
Trying to arrange for an orchestra, much less an 8-channel Sega Genesis emulator, is a nightmare without a demo. Trust me on this.
Play to a metronome
If you are going to record a demo on a keyboard, guitar, or some other live instrument, it’s important that you both practice and record to a click track.
Otherwise, when you import the demo into your DAW as your foundational guidepost, the iron-clad, unwavering click of the metronome will railroad you.
The one exception to this is if you choose to notate your demo in a program like MuseScore first. There are definitely advantages to this, just be advised, it will take longer than simply performing the demo.
As a general rule, whenever I play, practice, or record anything, I play to a metronome. It helps a “campfire” acoustic guitarist like myself stay on track and in time. In fact, any excuse to use a metronome, I take.
Set up markers
Once you get your demo imported into your DAW (you did record a demo, right?), a helpful next step is to set up markers. This is also something I learned from James Landino.
Most DAWs allow you to set up markers (sometimes also called regions), which help you navigate your timeline much more quickly.
Want to quickly jump to the C section to make sure the instruments are balanced well with the A section? Markers let you do that with a simple keyboard shortcut. Rather than deciphering waveforms and clicking around until you find it, you can immediately jump to your destination and shave a few seconds off of your workflow.
This also serves as a helpful structural tool. If you know your track is going to be around five minutes, you can plot out how many bars your verse needs to be, how many bars your pre-chorus and chorus need to be, and if you need to add an extra breakdown to make it to the five-minute mark.
It’s just another helpful way to get a bird’s-eye view of your composition without getting lost in the details.
Prepare your palette (mise en place)
One of the favorite things I picked up from all of my interviews was from Taylor Ambrosio Wood. A big issue she saw with newer composers is their propensity to add instrument after instrument with no real sense of intentionality.
The project inevitably becomes bloated and cluttered. This habit easily turns what could’ve been a simple, effective composition into a cacophonous excuse to use 25 new VSTs.

A cure to this is to prepare your instrumental palette before you begin composing. Taylor practiced this discipline in her work on Balthazar’s Dream. There’s actually a French culinary term for this: mise en place.
It means, “Everything in its place.”
Not only does this reduce option-anxiety, but it also provides healthy constraints for you in your composing process.
This really works. I challenge you to choose 5-7 instruments and stick with them throughout your entire next composition. Imagine you’re like a band director and these are your instrumentalists.
You can’t clone them, you must figure out how to best utilize them to accomplish your vision.
I think you’ll be surprised at how little time you waste combing through VST dropdowns, and how much time you spend actually creating.
Pick up another instrument
I remember watching a GDC talk where a composer showed a picture of her studio, which was adorned from top to bottom with instruments. Odd instruments, ancient and curious instruments, classic instruments… she had everything there.
She said accruing instruments is the best way for her to stay inspired. You have constant tools to make your vision come to life.
I experienced this firsthand when writing pop songs for an album I was making with some friends. I’m normally a guitarist, but after my wife bought me a ukulele for Christmas, I split my time between the two.
I found that the melodies, strumming patterns, and overall vibes that came out of me while playing guitar were almost indistinguishable from those that came from my ukulele playing.
One day, I started strumming, and the timbral difference plus the spark of a new instrument just produced a flood of melody ideas, one of them ultimately culminating in a song that ended up on the album.
If you’re feeling stale on your current instrument, challenge yourself to pick up a cheap trumpet on craigslist, or wish for a melodica for your birthday or something. It’s not only delightful to explore a new noise-maker, but it can produce some pretty amazing results in your compositions.
Reference checklists, systems, and processes whenever possible
Carlos Eiene (insaneintherainmusic) is one of the most analytical creative people I’ve ever met. He’s a walking paradox.
In our conversation, we discussed the many spreadsheets, process documents, and calendaring principles he follows to stay inspired and productive for his aggressive YouTube deadline.
The human brain, as Carlos and I discussed, is terrible at storing information. Every bit of energy your mind uses to store information is power that’s not going to creating new ideas.
That’s why storing your information in process documents take away a lot of the stress of knowing what to do next.
What is a process document? Well, Carlos has process documents for almost everything. Video production, editing, thumbnail creation, mixing – he’s got it all documented.
A simple composition process document may look like this:
- Record piano demo
- Set up DAW with tempo, key signature, and markers
- Set up palette (5-7 instruments)
- Record melody line with melody instrument
- Record bassline with bass instrument
- Record harmony inner voices with harmony voices
- Record rhythm with drum instrument
- Record sweeps, effects, and transitions
- Add EQ and compression
- Add time-based effects like reverb
- Automate reverb, volume, and effect parameters
Now, I just rattled these off. And each of these processes can have sub-processes, or even separate process documents for things like mixing and mastering, promoting things online, or uploading things to music distribution sites.
The whole point of this is not to add extra work on your plate, but to prevent that blank “deer in headlights” stare you have when you boot up your DAW in the morning and aren’t sure what to work on next.
With process documents, you never are left to wonder what your next step is. Have you completed the bassline? Great, check it off, and move on to the next item, harmony inner voices. This will not only help you finish songs faster but will also keep you motivated to work when your composition muscles grow weary.
The key is to pay close attention to how you work, and whenever possible, take note of your actions. If you have a repeated action that occurs over and over, write it down and log it into a file.
Creative work exercises all parts of the brain. In a real way, you are both the music director (big picture visionary) and engineer (nitty-gritty workhorse) of your project. Many of us try to juggle these two roles simultaneously. However, rapidly switching contexts like this is a surefire way to slow down.
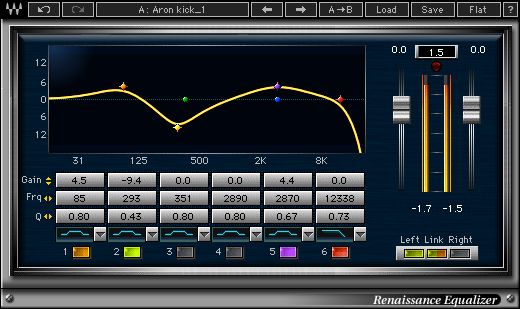
A decision you might make as a creative director is “I want these instruments to have more punch in the mid-range.” You must then switch to the engineer brain to say, “Okay, that requires a bump in EQ around 1 kHz – 2 kHz.”
The visionary creates the process document, and the engineer executes it. They just happen to be the same person. Make sense?
Start with the climax or drop
This tip is especially relevant for the electronic producers out there but can be applied across the entire spectrum of genres.
In my conversation with James Landino, he noted that if your song’s climax doesn’t have the highest energy (hence the name), the rest of the song will suffer.
When you start with the climax, it gives you a helpful reference point to know that everything before and after must be lower in energy. There’s nothing worse getting to your song’s climax and realizing you’ve already maxed out your faders and the energy has nowhere left to go.
This is helpful in modern DAWs, which allow you to strip away certain elements with a click of a mouse.
If you have a sequence of events that takes place every time you compose, write it down. Maybe you can find a way to automate that task or create a template to make that process even faster.
Complete micro-tasks before moving on
While working on Cybarian, I learned the importance of finishing a single disparate task before moving on to another. Here’s what I mean.
I would have a melody idea for a level theme, so I’d begin writing it in Deflemask. As I got about halfway into the B section, I’d think, “Oh, snap. It’d be awesome if the bass doubled the melody rhythm but moved in contrary motion.” So I’d get excited, abandon the melody halfway through the B section, and start on the bass part because I didn’t want the idea to slip away.
I’d finish the bass part, and then realize I left the melody undone in the B section, but now the bass is doing something different so… uh, let’s just start on the inner voices.
The next morning, after hours of chasing loose ends, I’d wake up to a Deflemask session that may as well have been in Greek. I had no clue where I started, where I left off, which parts were temporary and final… and the “friction” to my creative process was painful.
I learned my lesson, and in the later tracks, I committed to finishing an entire instrumental part before moving on the next one.
When an idea came into my head, I’d simply write it down on a piece of staff paper next to my desk. Sometimes I scribbled key phrases to jog my memory like “syncopate A section” or “vibrato on the lead.” Other times I would actually notate pitches for things I heard in my head.
I felt relieved that my ideas were kept in a safe place that didn’t distract me from the task at hand, and it made my workflow a lot faster.
Practice your workflow through composition challenges
A great way to test your workflow “in the wild” is to join an online composition challenge. There’s no better way to put your new composition ideas to the test than in a community that holds you accountable and provides regular feedback.
Two groups I recommend joining on Facebook are Sonic Storytellers and VGM Academy. They often host annual or semi-annual composition challenges that are a ton of fun and a great way to meet fellow composers.
Workflow Nuggets for Starting Songs
There are two bottlenecks I see composers run into. The first is finishing and “shipping” songs. The second is starting songs. Like I mentioned before, there are few things more daunting than an empty DAW session.
Below are a few tips for starting songs I’ve picked up from professional composers as well as my own experience composing, writing, and producing music.
MIDI Melody Rhythm Method
Come up with a fun rhythm to go over a metronome, then program in MIDI notes just on one pitch for that rhythm. Then move the MIDI pitches around until you have a melody you like at the rhythm you want.

EDM Prod explains it more here.
Copy an existing chord progression
Song Exploder is a podcast that explores how songs are written with interviews from the songwriters themselves. I highly recommend it to everyone reading, as it’s always fascinating to hear about the processes of fellow creatives.
There was one episode that struck me as particularly interesting. It featured the lead singer of Weezer, Rivers Cuomo, on his process for songwriting. The band’s frontman often encounters music that features an interesting chord progression.
When he does, he writes down the chords and plays them on electric guitar. He then saves the idea with an anagram and lets time pass, so as not to conflate the original song with his ideas and subconsciously plagiarize the artist in question.
He then sings his own original melodies over top of the chords. I’m not doing it justice, you gotta listen to this episode.
If you followed the action plan in my guide to transcription, you should have a transcription of one of your favorite songs.
Why not try to write another melody over top of this chord progression? If you’re too tempted to copy the original, consider transposing the chords into a different key or alter your instrument and tempo.
Start with a mode
Constraining yourself to a mode is a great way to write melodies you normally wouldn’t write. Raising or lowering a pitch also dramatically opens up your harmonic potential when it comes to chord progressions.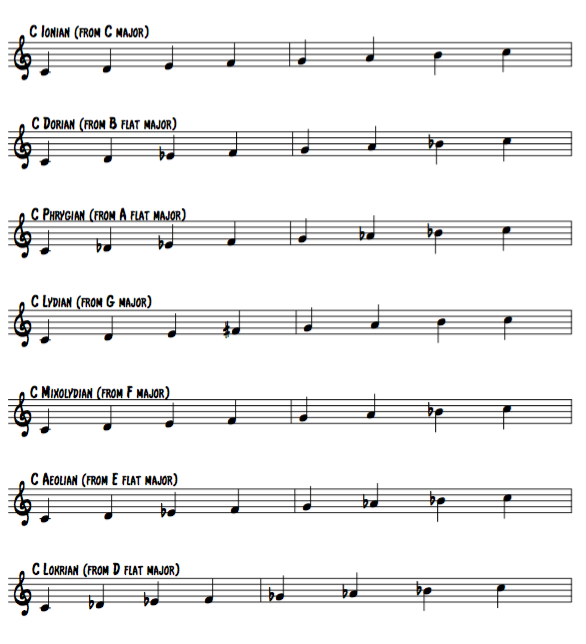
Composing this way can provide more tonal interest and subtlety than major or minor scales.
If you don’t know the seven major modes, I’m going to recommend that you brush up on your theory via this video by 8-bit Music Theory. It’s the most helpful way to learn modes that I’ve seen on the internet.
Modes are derivations of standard major and minor scales. They often alter one pitch that changes the feeling of the entire tonality. Adam Neely has a great video on how modes give greater nuance to the “light” and “dark” feelings often associated with major and minor scales.
Here are some examples of some video game tunes that are in. In order from brightness to darkness
| Game | Piece | Mode |
| The Legend of Zelda: Skyward Sword | Island in the Sky | Lydian (Major scale, but sharp the 4) |
| Animal Crossing | 1 PM | Ionian (Major scale) |
| The Legend of Zelda: Twilight Princess | Kakariko Village | Mixolydian (Major scale, but flatten the 7) |
| Super Mario 64 | Koopa Road | Dorian (Minor scale, but raise the 6) |
| Chrono Trigger | Frog Theme | Aeolian (Minor scale) |
| Chrono Trigger | Decisive Battle with Magus | Phrygian (Minor scale, but flatten the 2) |
| Final Fantasy VI | Mines of Narshe | Locrian (Minor scale, but flatten the 2 and the 5) |
YOUR OBJECTIVES:
- Test out 3-5 of the workflow tips I’ve listed and integrate the ones that work in your personal workflow
- Monitor your creative process and write down your repeatable tasks. Codify these insights in a process document in the next week or so